

If you’re running a WordPress site and want to add a dedicated blog page where your latest posts will be displayed, you’re in the right place! Creating a blog page in WordPress is a simple process, and it’s a great way to keep your visitors up to date with your latest articles, news, or updates. In this guide, we’ll walk you through the steps to create and set up a blog page for your WordPress website.
Step 1: Create a New Page for Your Blog
First, we need to create a new page that will serve as your blog page. Here’s how:
- Login to Your WordPress Dashboard
Navigate tohttps://yourdomain.com/wp-adminand log in with your credentials. - Create a New Page
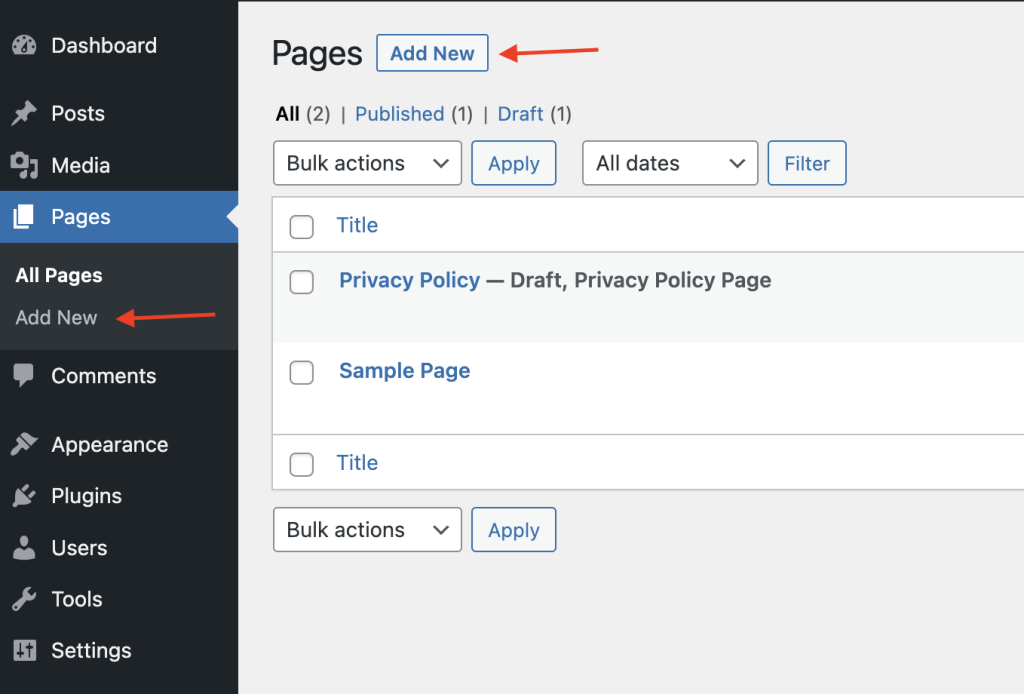
- In the left-hand sidebar, go to Pages > Add New.
- Title your new page “Blog” or something similar.
- You don’t need to add any content in the page editor, as WordPress will automatically display your posts on this page.
- Click Publish to create your new page.
Step 2: Set Your Blog Page as the Posts Page
Now that you’ve created the blog page, you need to tell WordPress to display your blog posts on this page. Follow these steps:
- Go to the Settings Menu
From the left-hand sidebar in your WordPress Dashboard, navigate to Settings > Reading. - Choose a Static Front Page
- Under the Your homepage displays section, select the option A static page.
- Set the Homepage dropdown to the page you want as your homepage (e.g., “Home”).
- In the Posts page dropdown, select the page you just created (e.g., “Blog”).
- Save Changes
Don’t forget to click the Save Changes button at the bottom of the screen.
Step 3: Customize the Blog Page Appearance
After setting up your blog page, you may want to customize how your blog posts look on this page. WordPress gives you several options for this:
- Theme Customizer
- Go to Appearance > Customize from the sidebar.
- Under the Blog or Content section (depending on your theme), you can adjust things like:
- How many posts to show on the blog page.
- Whether to display the full post or just an excerpt.
- The layout of your posts (grid, list, etc.).
- Widgets
- You can add widgets like a Recent Posts widget, Search Bar, or Categories list by navigating to Appearance > Widgets and placing them in the Blog Sidebar or other widget areas.
- Theme Settings
Depending on your theme, you might have additional options for customizing how the blog page appears. Check the theme documentation for any theme-specific settings that allow you to change the look and feel of your blog.
Step 4: Add Blog Posts to Your Blog Page
Once your blog page is set up, you can start adding blog posts:
- Create a New Post
- In your dashboard, go to Posts > Add New.
- Write your blog post, add media, and publish.
- Your new post will automatically appear on your blog page based on the settings you chose.
- Manage Posts
- If you want to change the order of posts, you can use categories, tags, or the sticky post feature to highlight specific posts on top.
Step 5: Link to Your Blog Page
To make sure visitors can easily access your blog, add a link to your blog page in your website’s navigation menu:
- Go to Menus
- From the WordPress dashboard, navigate to Appearance > Menus.
- Add Blog Page to Menu
- On the left-hand side, you’ll see a list of pages. Select your “Blog” page and click Add to Menu.
- Drag it into your desired position on the menu, and click Save Menu.
Conclusion
That’s it! You’ve successfully created a blog page in WordPress where you can publish your blog posts. WordPress makes it super easy to set up a blog, and now you can start sharing your thoughts, insights, or news with your readers. If you want to enhance the look and functionality of your blog page, consider using plugins and custom widgets to tailor it to your needs.
Happy blogging!